How To Use RabbitMQ With Symfony Messenger
13 May 2020

In this article I will first explain how the queues work and in the second part we will install Symfony, messenger component and rabbitMQ and we will create a simple project example of product order basket in the store.
As a rule, new queue items are added as last ones (enqueue) and then they are removed as they move to the beginning of a queue (dequeue).
(First In, First Out, FIFO)
Type of queue:
- Cyclic
- Double-sided
- Priority
Cyclic queue has a wheel structure, if it comes down to the last element of the list it automatically starts from the beginning.
Double-sided queue – both sides can be used for adding as well as deleting nodes.
In case of priority queue, elements are added according to a given pre-defined priority which means that element with a higher priority will be moved up higher in a hierarchy and will be serviced earlier, not like in a classic queue when it is added up to the end of a queue.
The examples of such queues are the services with free accounts and fee-paying subscribed accounts, or insurance application where you report a damage and it is pre-defined that more serious damages (like accidents) are serviced with a higher priority than just regular bumps.
Symfony Messenger
Main concepts:
- Message – any object
- Bus – dispatching messages
- Message Handler – processes for servicing messages
- Transport – sending and receiving messages, sending to queues for example via RabbitMQ
- Worker – processing and consuming messages
Stack: Symfony 4.3.11, PHP 7.3.16, MySQL 5.7.29
- Create a project with the following command.
composer create-project symfony/website-skeleton queue-project “4.3.*”
- Start the server with the command.
bin/console server:run
- Install Messenger component.
composer require symfony/messenger
- Create controller.
bin/console make:controller
- In method basket messages are dispatching.
<?php declare(strict_types=1); namespace AppController; use AppMessageCommandOrderProduct; use SymfonyBundleFrameworkBundleControllerAbstractController; use SymfonyComponentHttpFoundationResponse; use SymfonyComponentMessengerMessageBusInterface; use SymfonyComponentRoutingAnnotationRoute; class ShopBasketController extends AbstractController { private $messageBus; /** * ShopBasketController constructor. * @param MessageBusInterface $messageBus */ public function __construct(MessageBusInterface $messageBus) { $this->messageBus = $messageBus; } /** * @Route("/", name="shop") */ public function index(): Response { return $this->render('shop_basket/index.html.twig', [ 'controller_name' => 'ShopBasketController', ]); } /** * @Route("/shop/basket", name="shop_basket") * @throws Exception */ public function basket(): Response { $productNumber = 1; $productAmount = 9.90; try { $this->messageBus->dispatch( new OrderProduct($productNumber, $productAmount )); } catch (Exception $exception) { throw new Exception('Error buy product.'); } return new Response(sprintf( ' success add to basket!' . self::randProduct() )); } public function randProduct() { define('PRODUCTS', [ 'Backpack', 'Cap', 'Bag' ]); echo PRODUCTS[array_rand(PRODUCTS)]; } } - Next, we create OrderProductHandler. This handler evokes $orderProduct, and in example time interval 9 second, it consumes messages. Here your domain logic is located.
<?php declare(strict_types=1); namespace AppMessageHandlerCommand; use AppMessageCommandOrderProduct; use SymfonyComponentMessengerHandlerMessageHandlerInterface; final class OrderProductHandler implements MessageHandlerInterface { public function __invoke(OrderProduct $orderProduct) { sleep(9); var_dump($orderProduct); } } - Create directory Message/Command and PHP class OrderProduct. This is a class where there is a PHP object that can be handled by a handler.
<?php declare(strict_types=1); namespace AppMessageCommand; class OrderProduct { private $productNumber; private $productAmount; public function __construct(int $productNumber, float $productAmount) { $this->productNumber = $productNumber; $this->productAmount = $productAmount; } public function getProductNumber(): int { return $this->productNumber; } public function getProductAmount(): float { return $this->productAmount; } } - Register handler.
#config/service.yaml AppMessageHandler: resource: '../src/MessageHandler' tags: ['messenger.message_handler'] - Doctrine transport configuration.
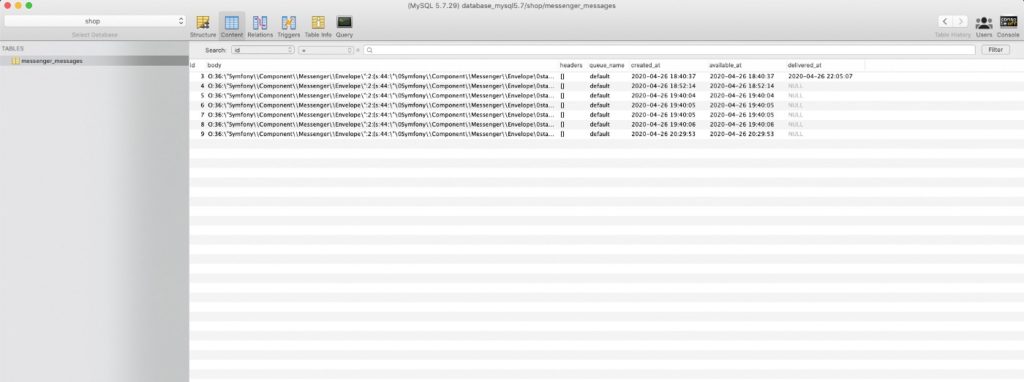
#config/packages/messenger.yaml framework: messenger: transports: async: dsn: '%env(MESSENGER_TRANSPORT_DSN)%' routing: 'AppMessageCommandOrderProduct': async - We also need to define the messenger transport. Doctrine transport was introduced in Symfony 4.3.
#.env
MESSENGER_TRANSPORT_DSN=doctrine://default
- The following command will consume the messages from the queue.
bin/console messenger:consum
- Then install RabbitMQ, login and password default is guest/guest.
brew install rabbitmq
brew services start rabbitmq
http://localhost:15672/ - You still need to install AMQP transport and add to php.ini extension=amqp.so (configuration below it works on Symfony 4.2).
composer require symfony/amqp-pack - Define the transport.
#.env
MESSENGER_TRANSPORT_DSN=amqp://guest:guest@localhost:5672///messages
- In case of RabbitMQ transport, the remaining part of its configuration is analogous to Doctrine transport.
config/packages/messenger.yaml
framework:
    messenger:
      transports:
          amqp: '%env(MESSENGER_TRANSPORT_DSN)%'

      routing:
        'AppMessageCommandOrderProduct': amqp
Summary
You have learned the Messenger component. We used the two transports Doctrine and RabbitMQ.


